sexta-feira, 21 de dezembro de 2012

P.S. I MADE THIS

I was wondering on Bloglovin and found this oohh soo creative blog P.S. I made this. It is such a fun blog where you can find many cool and crazy ideas to make yourself. I just had to blog about it because I´m a crafty myself and for sure I´m gonna work out some of there ideas! You can see more here.
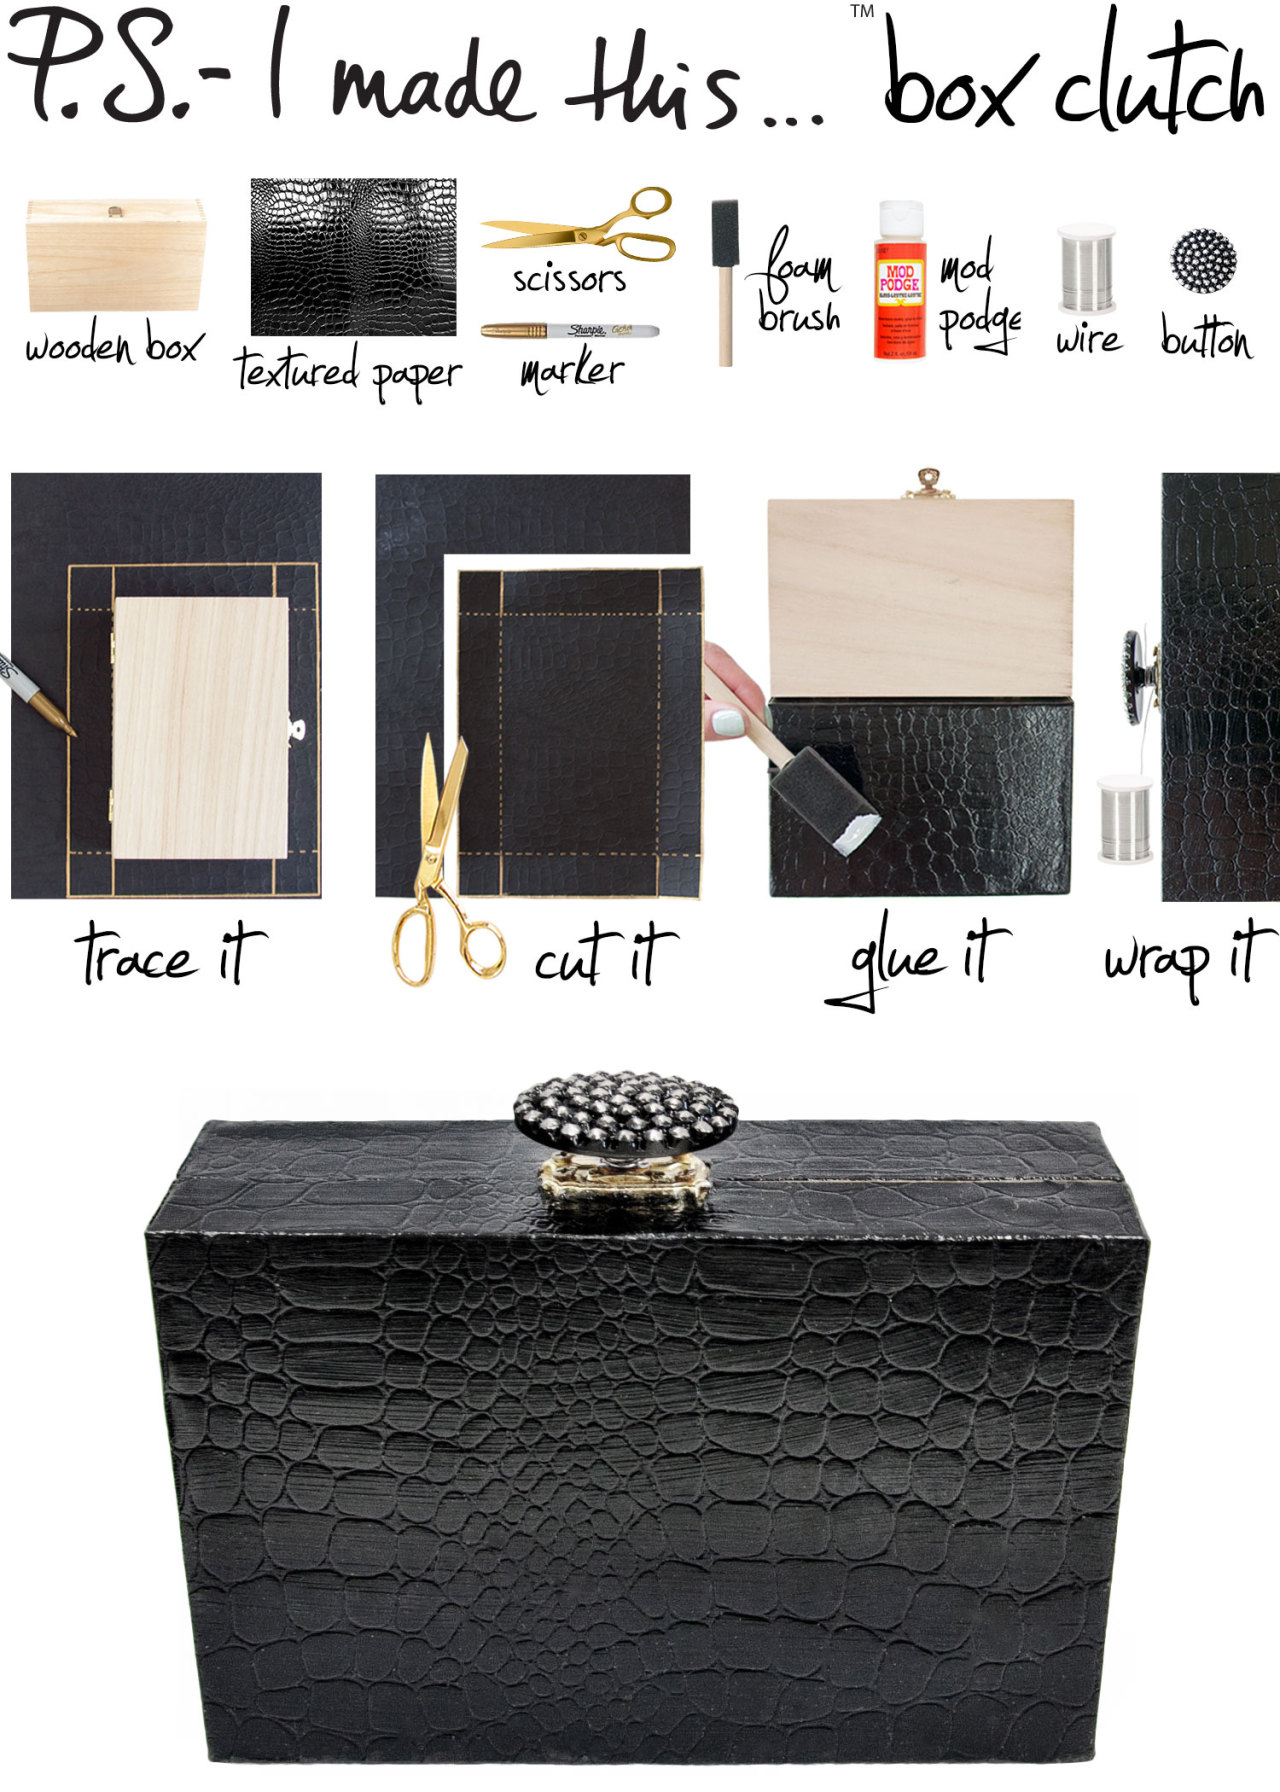
Isn´t this clutch a good idea? You can make it as you want, I´m gonna try it with thin leather or a nice fabric. And the hologram clutch is great to. I wanted to get one but now I will make it myself.
 

Still searching for last minute gift ideas for the girl who has everything? Repeat after me: “Don’t buy it off the shelf when you can Do It Yourself.” Get inspired the opulent, special occasion accessories of Nancy Gonzalez, Judith Lieber, and Charlotte Olympia and wow someone on your list with a luxe clutch. A bold, graphic shape wrapped in chic texture and a little touch of bling comes together to create a covetable object she won’t want to put down! 

To create: Trace the exterior of the wooden box with a marker onto the backside of textured paper. Use solid lines to indicate cuts and dotted lines for folds. Cut out the area with scissors. Glue the paper to your box with mod podge and a foam brush. Repeat these steps for the other side of the box. Attach a button to embellish the top by wrapping wire to the closure.
 

It’s official…the fashion world is hollering for all things holographic! From the underground to the mainstream, designers from Eddie Borgo to Chanel have us seeing in 3D. Illuminate your life with an accessory that will light up any room. We teamed up with Who What Wear to create this statement clutch inspired by Stella McCartney’s Spring 2013 collection that will add an eye-popping, magical finish to any look. Get inspired to get iridescent and luminescent, then get ready to Instagram that hologram! 


To create: Using a marker, trace all sides of the plastic envelope to the backside of the self-adhesive film. Cut out each section with scissors. Carefully peel and stick the film to your envelope. Starting from one corner, firmly apply pressure with the palm of your hand to smooth out air bubbles. Trim any excess film from the edges for a clean polished look.

Sem comentários:

Enviar um comentário

write youre dreams, youre thoughts, youre ideas...

Related Posts Plugin for WordPress, Blogger...